All Day Video Setup
All Day Video Setup
This page is obsolete and is retained for historic purposes.
The alldayvideo part has been replaced in the main software under Control Panel.
I'd love to update the page, but i do not understand the logic of that menu, while the description of the buttons seem logic the actions do not always correspond to what they suggest. I hope someone with more experience will exactly describe what setting are required for what function, so this wiki page may be updated then. --Gert 09:46, 30 November 2007 (UTC)
This article will help you get started with the all day video feature in Weather Display.
The all day video compiles your Web cam images into an almost seamless video display for entire day.
For a nice example, download daymovie.wmv and play using Media Player.
First, make sure your Web camera is working properly and that your files are saved correctly. This feature uses the jpgwebcam.jpg images, so make sure these are being created and saved properly before you start.
More than 1,000 images will be used to make the video. To keep the many images from cluttering your webfiles folders, you might want to consider creating a new folder in the Weather Display folder named webcam. Change the Web cam settings so that images are saved in this new folder location. You should decide now if you want to make this change and complete the changes before proceeding.
The following image illustrates the options necessary for saving the files.
- On the Weather Display main window, click Control Panel.
- Under Web Site Configurations, click Web Cam.
- Click Setup/view direct live web cam capture.
- On the File Settings tab see the following options:
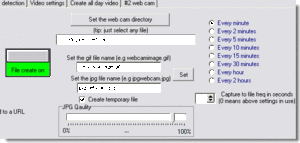
Make sure Every minute is selected.
Download the Microsoft® Windows Media Encoder 9 Series.
After you have downloaded the file, execute it to run the setup.
In Weather Display, you need to make time stamped files.
- On the Weather Display main window, click Control Panel.
- Under Web Site Configurations, click Web Cam.
- On the Time stamped files setup tab, then click the Time Stamped Files Setup tab.
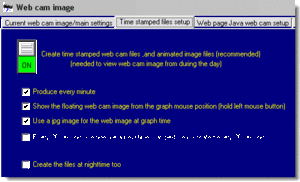
Make sure, the produce every minute check box is selected.
Hidden Feature Select the Show the floating web cam image from the graph mouse position (hold left mouse button) and Use a jpg image for the Web image at graph time check boxes. After your video has been produced, when you are viewing your main window in Weather Display, while your mouse is over the upper right graph (baro/wind), hold down your left mouse button, and move the mouse back and forth over the graph, your video will appear in a pop-up window and show the video move in time as you move your mouse back and forth.
- Click the Current Web Cam Image/Main Settings tab.
- Click Setup/View Direct Live Web Cam Capture.
- Click the Create All Day Video tab.
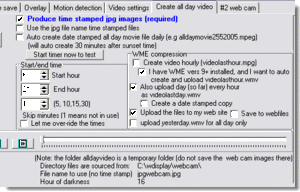
If you select the check boxes shown above, you will be create video for the entire day day, and it be uploaded every hour.
You can view the video during the day up until the last hour.
After sunset, the entire day's video will appear. You can select the other check boxes to set additional options.
The text at the bottom of the screen shot above, tells you the folder used, and the image used, etc. Make sure this corresponds with your setup.
After completing the last section, click Save, and then Close. The Current Web Cam Image/Main Settings tab appears.
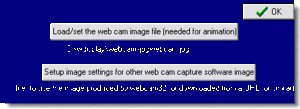
Click the Load/Set The Web Cam Image File.
You should see your Web cam image on the left and the file name should appear under the button.
Your video is created around seven minutes after the top of the hour. Look in your Weather Display folder for the alldayvideo folder. You should begin to see images amassing in the folder. Scroll down to the bottom of the folder, and you should see a several Windows Media files. One will be videolastday.mpeg. That is your original large file video. Also, you will see videolastday.wmv. This is the compressed file that will be uploaded to your Web site. The video is uploaded automatically after it is created each hour.
